


この記事を読むのに必要な時間は約 11 分 43秒だお。
Time required to read this article is about 11min43sec
こんぬつわ。かもねぎです
How have you been ?
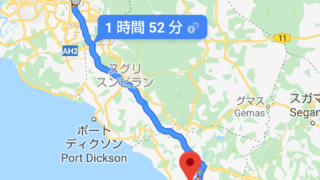
最近は記事を書くのにスマホの方がお手軽に、気が向いたときに、街角で簡単に書けますのでスマホで書いて、PCを使って細部を整えるという作業をしているのですが 地図を記事内に埋め込むときにマジでイライラしてます。 ブログで旅行記事書いてると、グーグルマップを多用します。旅ブログ以外のお店紹介とかでもマップはよく使いますよね。
Recently, when writing articles, smartphones can be written easily on the street corners, so it is easy to write on a street corner, so I’m working on writing with smartphones and using PC to arrange details. I am really annoyed when embedding a map in an article. You write travel articles on blogs, and I use Google maps extensively. Maps are often used even for shop introductions and travel blogs.
今まではプラグイン使わずにpc版グーグルマップの共有 埋め込みを利用して、コードを取得して、websiteに貼り付けるか、スクリーンショットをはっつけていました。 プラグインの他にjetpackに標準搭載のmapもあるのですが、住所をグーグルマップからコピペしても該当位置にマーカーが表示されないのであきらめました。住所欄への入力内容が良くわかりません。
So far, without using plugins, we used code sharing with the pc version google map embedding to get the code and paste it on the my website or paste the screenshot. In addition to the plug-in, there is also a map that comes with jetpack as a standard feature, but I gave up because the marker is not displayed at the corresponding position even if the address is copied from Google map. I do not understand well the input contents to the address column
普通はこういった記事では便利なプラグイン5選とか7選とかいろんなプラグインの紹介をするのですが、今のところ最もベターでうまく動作したプラグインは1つしかありませんので1選としました。グーグルマップのAPIキーを取得しなければいけないという事も初心者には分かりづらいです。何選で紹介している人たちがいますが、間違えなく自分で試さず、適当な記事を書いてるんじゃないかと思うくらいです。Normally, these articles introduce 5 or 7 useful plugins and various plugins, but for now there is only one plugin that worked the best, so I chose one. It is also difficult for beginners to have to obtain the API key of Google Map. There are people who have introduced in the selection, but I do not try it by mistake and I think that I am writing a suitable article.
GoogleMap ENBED

唯一自分のサイトで表示がうまくいったプラグインです。他のプラグインでうまく表示されない原因は多分Google Maps Platform apiの設定がうまくいかないためではないかと思います。このプラグインもapiの設定が必要なんですが、唯一うまくいきました。
This is the only plug-in that has been successfully displayed on my site. The cause that is not displayed well with other plug-ins is probably because the setting of Google Maps Platform api does not go well. This plug-in also needs api configuration, but it only works.
プラグイン使用前の準備 グーグルプラットフォームで登録 Preparation before using plug-in Register with Google platform
まずグーグルマッププラットフォームにアクセスします。
First we will access the Google Map Platform.

こちらでAPIキーを取得してください。CREDITCARDを登録しないと取得出来ません。自分のWEBSITEの地図のクリック数により課金が発生しますが、かなりの大量クリックが無いと(よっぽどバズらない限り)課金にならないと思います。また、課金になる前になんらかの連絡がグーグルから来て、拒否すれば課金されない代わりに表示されないないようになるようです。全部英語で書かれているため、めんどくさくて細部まで読んでないので自己責任でおねがいします。といってもそんなやばいことないですよ
Please get the API key here. It can not be acquired without registering CREDITCARD. Charges will occur depending on the number of clicks on your WEBSITE map, but I think that you will not be charged unless you have a large number of clicks (unless you’re buzzing). Also, it seems that some contact will come from Google before being charged, and if you decline it will not be displayed instead of not being charged. Since everything is written in English, I will ask you at your own risk as it is not painful and you will not read the details. There is no such thing to do though
登録手順 Registration procedure
マップを選択します
Select a map

最初は日本語なんですが途中から英語になりす。
At first it’s Japanese, but in the middle it’s English.
Nextをクリックします。

SELECT projectはデフォのmy projectでも自分のわからやすい名前で登録でもなんでもいいです。
SELECT project may be my project by default or any name that I can easily identify.

My projectにして次に進みますMake it My project and proceed next

完了です done

これで自分のapiが発行されてます。このI’dはアプリの設定で必要になります。
My api is now issued. This I’d is required in the app settings.
最後にクレジットカードを登録してください。クレジットカードを登録しないとアクティベートされず、サイトに貼り付けた地図も表示されないです。Please register your credit card at the end. It will not be activated unless you register a credit card, and the map pasted on the site will not be displayed.
注意書きに無料で使用出来る金額等が書いてありますので、真剣に読んでください。グーグル翻訳使えば楽勝です
The amount of money that can be used for free is written on the note, so please read it seriously. It is easy to use Google translation
プラグインの使用方法 How to use plugin
このプラグインを使うときはスマホを使用するのがいいと思います。理由はスマホのグーグルMAPアプリの方がサクサク動くからです。キャプチャ画面は全てスマホ画面です。ワードプレスダッシュボードでGOOGLEMAP SRMをタップします。
When using this plug-in, I think it is better to use a smartphone. The reason is that the smartphone’s Google MAP application works better. All capture screens are smartphone screens. Tap GOOGLEMAP SRM in WordPress dashboard.

次にCREATE NEW MAPをタップ
Then tap CREATE NEW MAP


次にマップのタイトルを記入して GOOGLEMAPで取得した緯度経度をコピペします
Next, enter the title of the map and copy and paste the latitude and longitude obtained by GOOGLEMAP

最後にUPDATEをタップして終了です
Finally, tap UPDATE to finish

今入力完了した地図のショートコードが作成されました。
The short code of the map you have just entered is created.
ショートコードをコピーして自分の記事内にペーストすれば完了です
Copy the short code and paste it into your own article
グーグルマップアプリでの緯度経度の取得方法のコツ
Tips on how to get latitude and longitude with Google Map app
グーグルマップアプリでの緯度経度の取得方法のコツですが、マップ上の店舗、ホテル等をタップしても出ない事の方が多いです。緯度経度を取得したい店舗、ホテル等のすぐ前にある道路等タップしてもらうと簡単に緯度経度を取得できます。
It is a tip of the acquisition method of the latitude longitude in the Google map application, but there are many things that it does not come out even if you tap a store, a hotel, etc. on the map. You can easily get the latitude and longitude by tapping the store, etc. where you want to get the latitude and longitude, and the road immediately in front of the hotel etc.
プラグインのマップにアイコンが表示されるのですが、ほとんど問題になるようなズレは無いです。
The icon is displayed on the map of the plug-in, but there is almost no gap that is a problem.